Sea Blue Lens


26 Comments

Photo-Heart Connection: March 2014

The moment I saw this photograph, I knew that it was going to be my Photo-Heart Connection image for March.
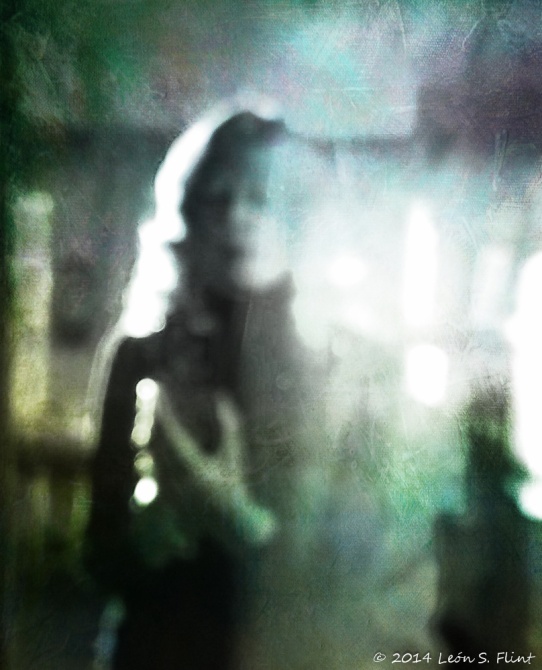
IMG_2826Through the Looking Glass [208/365]

Why? That’s the question I’m still pondering. Perhaps it was the surprise element in how it came to be.

It was very early (for me, anyway) in the morning and I was getting dressed to meet a friend for breakfast. The rising sun was streaming in the window, striking the mirror on my antique dresser and backlighting me at the same time. The sunlight was doing interesting things to the scratched and hazy surface of the old mirror, so I grabbed my iPhone and took several shots, moving around a bit in relation to the sun, shadows, and reflection, hoping for an interesting self-portrait.

This photo was the last shot of the series, and a complete accident. All the rest were sharply focused — and sharply disappointing. None of them captured the excitement I felt at seeing that light. This one made me stop and suck in my breath, all the while wondering, What happened? How did I get this out-of-focus image? Who cares? Let’s process it!

So I cropped it a bit, and converted it to black and white — something I seldom even think of, but it felt right for this image. Then I brought it into the Distressed FX app and used a filter that added some colored, grungy texture. Quick and sure, yes, that’s it, perfect!

Both the image itself and the making of it are quite unlike my usual practice. The end result is both Me and Not-me. A sort of spirit selfie, not quite corporeal. Who is that blurry woman? What is she doing, where did she come from, and where is she going? All I know is…she’s discovering more of herself every day. Every time I look at this serendipitous, spontaneous photo, I’m reminded of the excitement I felt when I first created it. I can’t wait to see what will be next.

Linking with Kat Eye Studio’s Photo-Heart Connection for March.  Come join us! 


19 Comments

Painting Pictures

I have a new toy! A couple of weeks ago, a friend in a Facebook group I belong to mentioned an iPhone app called Waterlogue. It sounded intriguing and seemed like an affordable splurge (under three dollars) so I indulged myself. And have I ever been having fun since! Here’s my very first try:

IMG_2311Beginner’s Luck

And the second:

IMG_2321Huh. Maybe It’s Not Just Luck.

Yes, they really are photographs, and what this app does to them in an instant seems more like magic than technology. In each case, I selected a picture from my Photo Stream on the iPhone, the app did its thing to it in about 3 seconds, and I saved it back to my photo library. Done.

Here’s a before and after:

IMG_1904

IMG_2377Summer Vacation

Here’s one image done three ways:

IMG_2381“Natural”

IMG_2379“Bold”

IMG_2342“It’s Technical”

Are we having fun yet? I’ve been deliberately choosing colorful images to transform, but it does nice things even with my presently monochromatic environment. Here we have a white house and white car in the white snow under an overcast pearly-white sky:

IMG_2382New England Winter

One nice side effect of playing with this app is that it has inspired me to get out my actual watercolors, which I haven’t used in much too long, and have a try at some real painting again. And by “real painting,” I still mean “playing”!

Meanwhile, until spring arrives to produce some real flowers, here’s a couple of tulips from two years ago, newly Waterlogued.

IMG_2323It’s Coming

Have a wonderful weekend!

Note: I have no stake in Waterlogue and am not being paid to endorse it. I’m just happy to have heard about it myself, so I thought I’d pass it along. It’s been a fun way to spend some time when the snow’s falling and it’s too cold to go outside. 


13 Comments

Blurred Vision Part 2

Last month, Exploring With a Camera was about using blur creatively when taking photographs. This month, Artistic Blur Part 2 is about adding blur to images during post-processing.

I don’t normally do a lot of “creative” or special effects post-processing. I’m more focused (pardon the pun) on capturing what I see and getting my photos to be sharp. Why would I want to mess them up by making them blurry in post-processing?

Then I saw a couple of other people’s responses to this prompt and it looked like they were having fun, so I thought I might try it. I pulled a few images from my archives and started to play.

102_0206 alium seed headStarburst

This is an onion that had bloomed and gone to seed in the garden. I used Photoshop Elements to add a Radial Blur filter with a zoom effect.

DSC_0046In One Basket

This blur was added in Lightroom. In the original photo, the basket was sharp while the eggs were out of focus. I moved the clarity slider to the left (minus 71) and decreased the vibrance and saturation, which gave the image a soft overall glow that I liked.

101_0726 bird angelGarden Guardian

In PSE I added a layer of Gaussian blur to this little angel using the Linear Light blend mode. Then I added a filter layer of enlarged grain.

DSC_0123Flight

In this image, the background was already somewhat blurred due to the depth of field, but the bird was sharp. I tried several different effects and decided I liked this one best. I added a texture layer (Empty Page, a free texture from the lovely Kim Klassen) and then added a Palette Knife filter. I’m not completely satisfied yet and may try some other things with this one.

Here are the four images before I began playing with them:

Befores

I really enjoyed this exploration. I’ve already got a few more images in mind that I’d like to try some of these techniques with. Thank you, Kat, for all of the fascinating aspects of photography you’ve introduced me to through Exploring With a Camera.


12 Comments

Fun with Photoshop

I have been having the best time! The lovely Kim Klassen offered a free, 10-day mini-Photoshop class and I took her up on her generosity. It’s very, very basic — like how to use layers and layer masks and other such elementary things — but it’s been a revelation to me. And this despite my having used PS (self-taught) for nearly a dozen years at my work.

Somehow I always managed to get the job done, even though I knew I wasn’t really doing it “right.” I know this sounds like a shameless plug for Kim’s classes, but I have been truly impressed. I was learning new stuff from the very first lesson. It’s mostly the same things I was already doing in my own muddling way, but oh, so much easier now.

I’ve even tried textures. And while I still don’t totally get the texture thing, I have to admit it was fun and I can see its occasional usefulness. (I have a friend who’s probably laughing her head off right now. You know who you are.)

Here are a few samples of my “homework”:

I have so much more to learn. But I really enjoy Kim’s teaching style, so I’ve signed up for more. Her voice is calm and somehow comforting, and she makes it all seem so simple. She doesn’t even know me, but she tells me I can do this and I believe her.


6 Comments

A Matter of Perspective

I learned something today. A few days ago, Brenda, one of my fellow students in Kat Sloma’s great Find Your Eye e-courses, wrote a blog post about correcting perspective distortion using Photoshop. I commented on my disappointment when I realized she was using Photoshop features that my Photoshop Elements doesn’t have.

This morning she replied with a link to a simple online tutorial explaining how to do the same thing in Elements. So I tried it.

Now, I’ve been a pretty sophisticated and advanced user of word processing software for longer than I care to think about. But when it comes to image processing, I’m like those people who line up text using the space bar because they don’t know how to set tabs. This morning’s experience sure proved that. I need to spend some time with a good instruction book and my PS Elements and get to know it a whole lot better.

Guess what? Photoshop Elements has a grid that can be superimposed over my photo while I’m editing it, to help with lining things up vertically and/or horizontally. Did you know that? I didn’t know that. How could I have not known something so basic?

Anyway, here are the results of a couple of experiments using the grid and PSE’s Image-Transform-Distort function.

Straight out of the camera

Adjusted to compensate for lens tilt

As taken, except for some foreground cropping

Adjusted image

So, what do you think? Does correcting the perspective improve the pictures?

I really had fun playing around with this. And that grid thing? Totally awesome! There’s even a keyboard shortcut to toggle it on and off.

Thanks, Brenda!

.